
The story
Ten years after London
More than ten years ago I should have been in London.
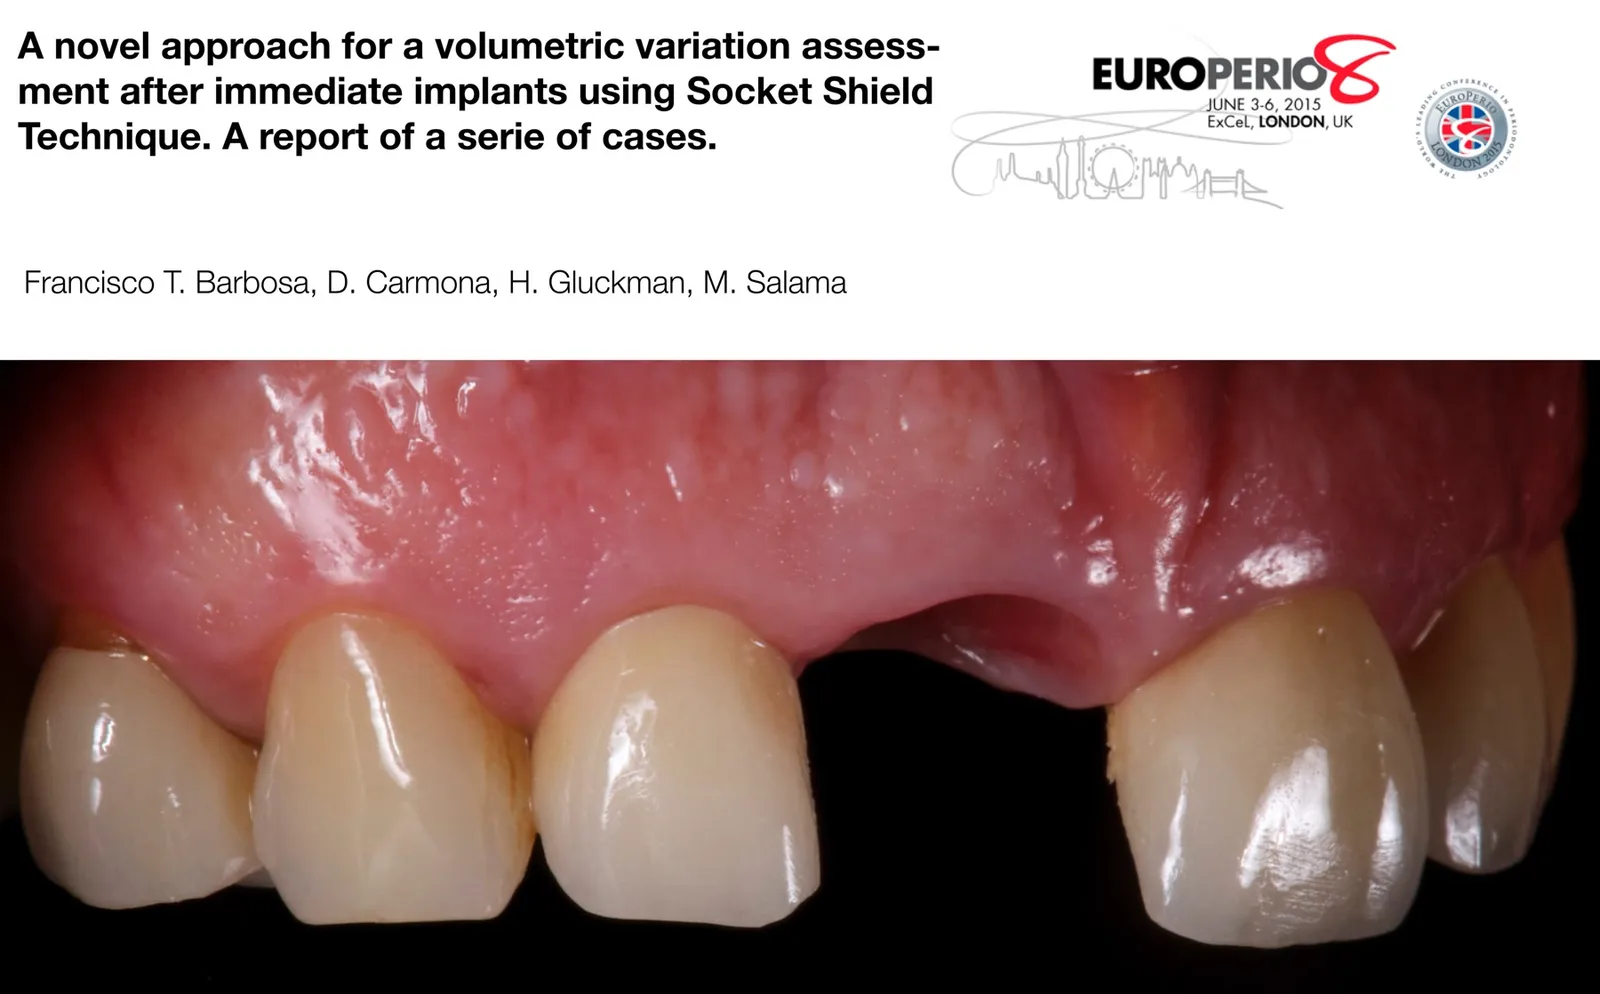
EuroPerio 8, June 2015. An e-poster on socket shield cases with my name on it (P1067), and a flight I had already planned in my head. My wife had a different plan. Our daughter Olivia was due any day, and traveling was not up for discussion.
She was right. Olivia was born right after the congress. I would have missed her birth to stand next to a poster. That is the part of the story nobody knows. Olivia is 11 now, and she runs the house. She is the boss.
Two years later, Maxillaris, the Spanish dental magazine, chose this case as its best case of 2017. They printed my name as "Fernando". I took the prize anyway.
I'm not the kind of clinician who only shows his best cases. But when one comes out close to excellent, I think I'm allowed to brag a little. This is that case.
The pressure
The case I could not fail
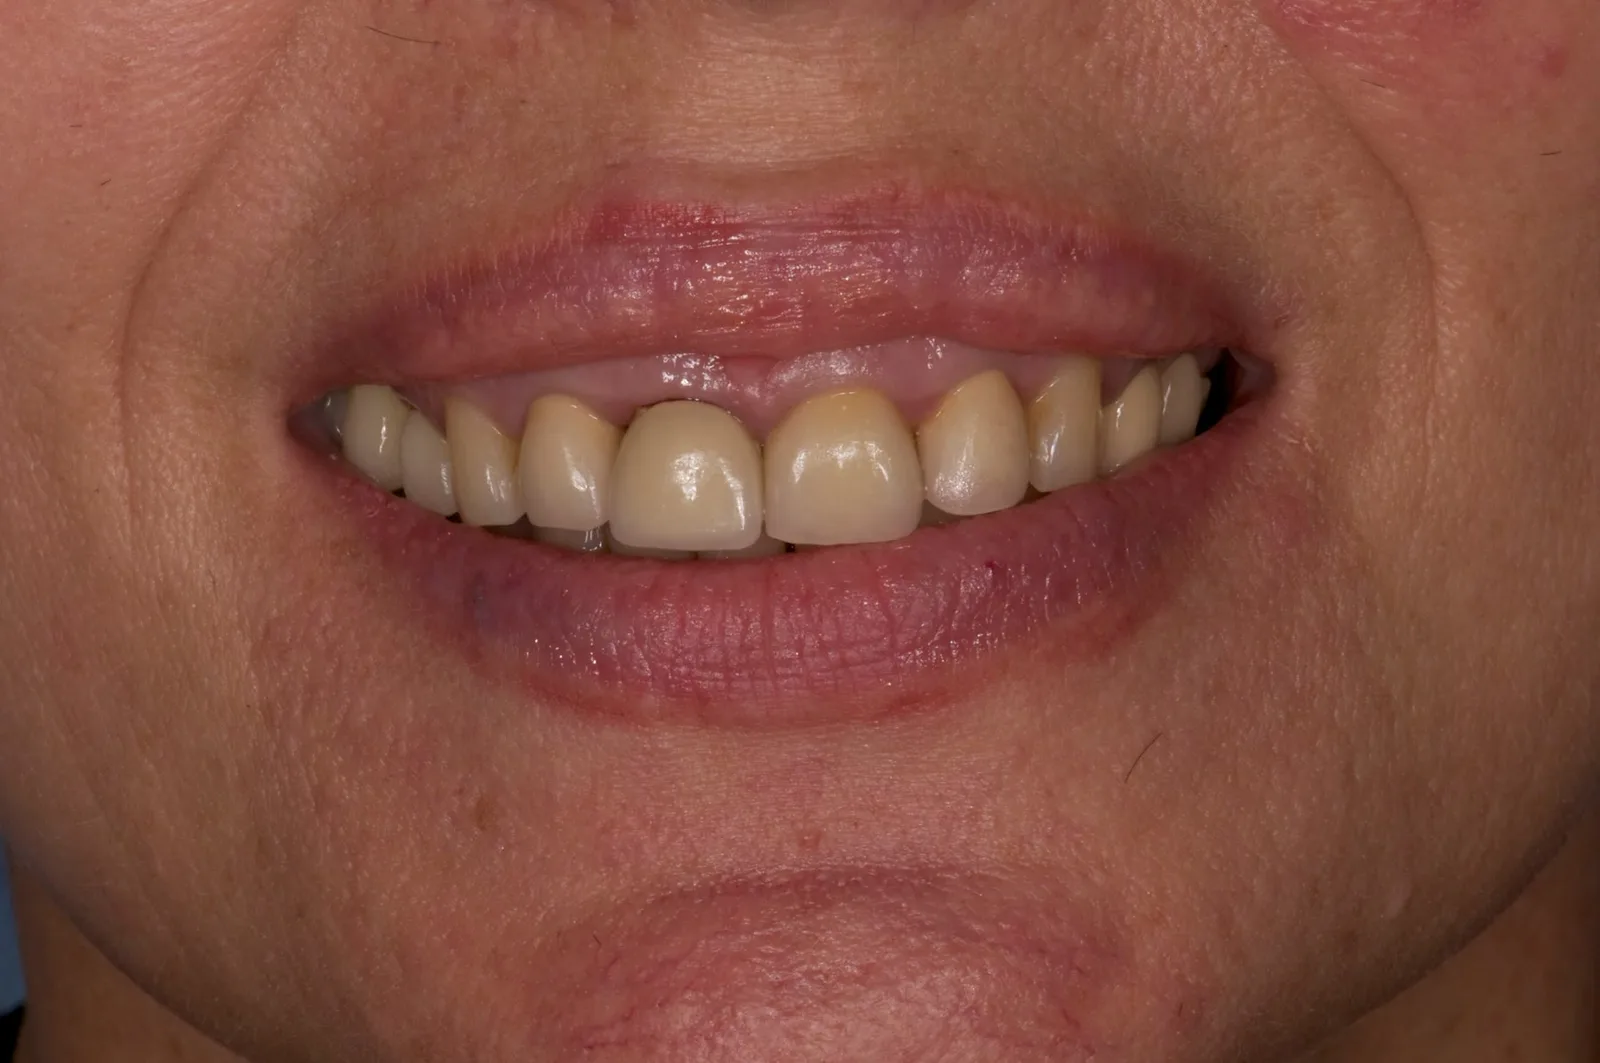
The case is from 2014. On paper, the pressure came from the patient: a high smile line that shows the gingival margins of the front teeth, and high expectations. Any recession, any grey shadow at the margin, would be visible every time the patient smiled.
The real pressure was sitting in the waiting room. The patient's boyfriend, a man of about two meters, was waiting for me. I was quite sure that if this case failed, I would have a much bigger problem than a recession.
Some cases push you to your limits. This one had help.
And yes, at congresses the spotlight always went to the bundle bone talks, so this case never got much stage time. Ten years later, it gets its own article.
The biology
Why the buccal wall disappears after an extraction
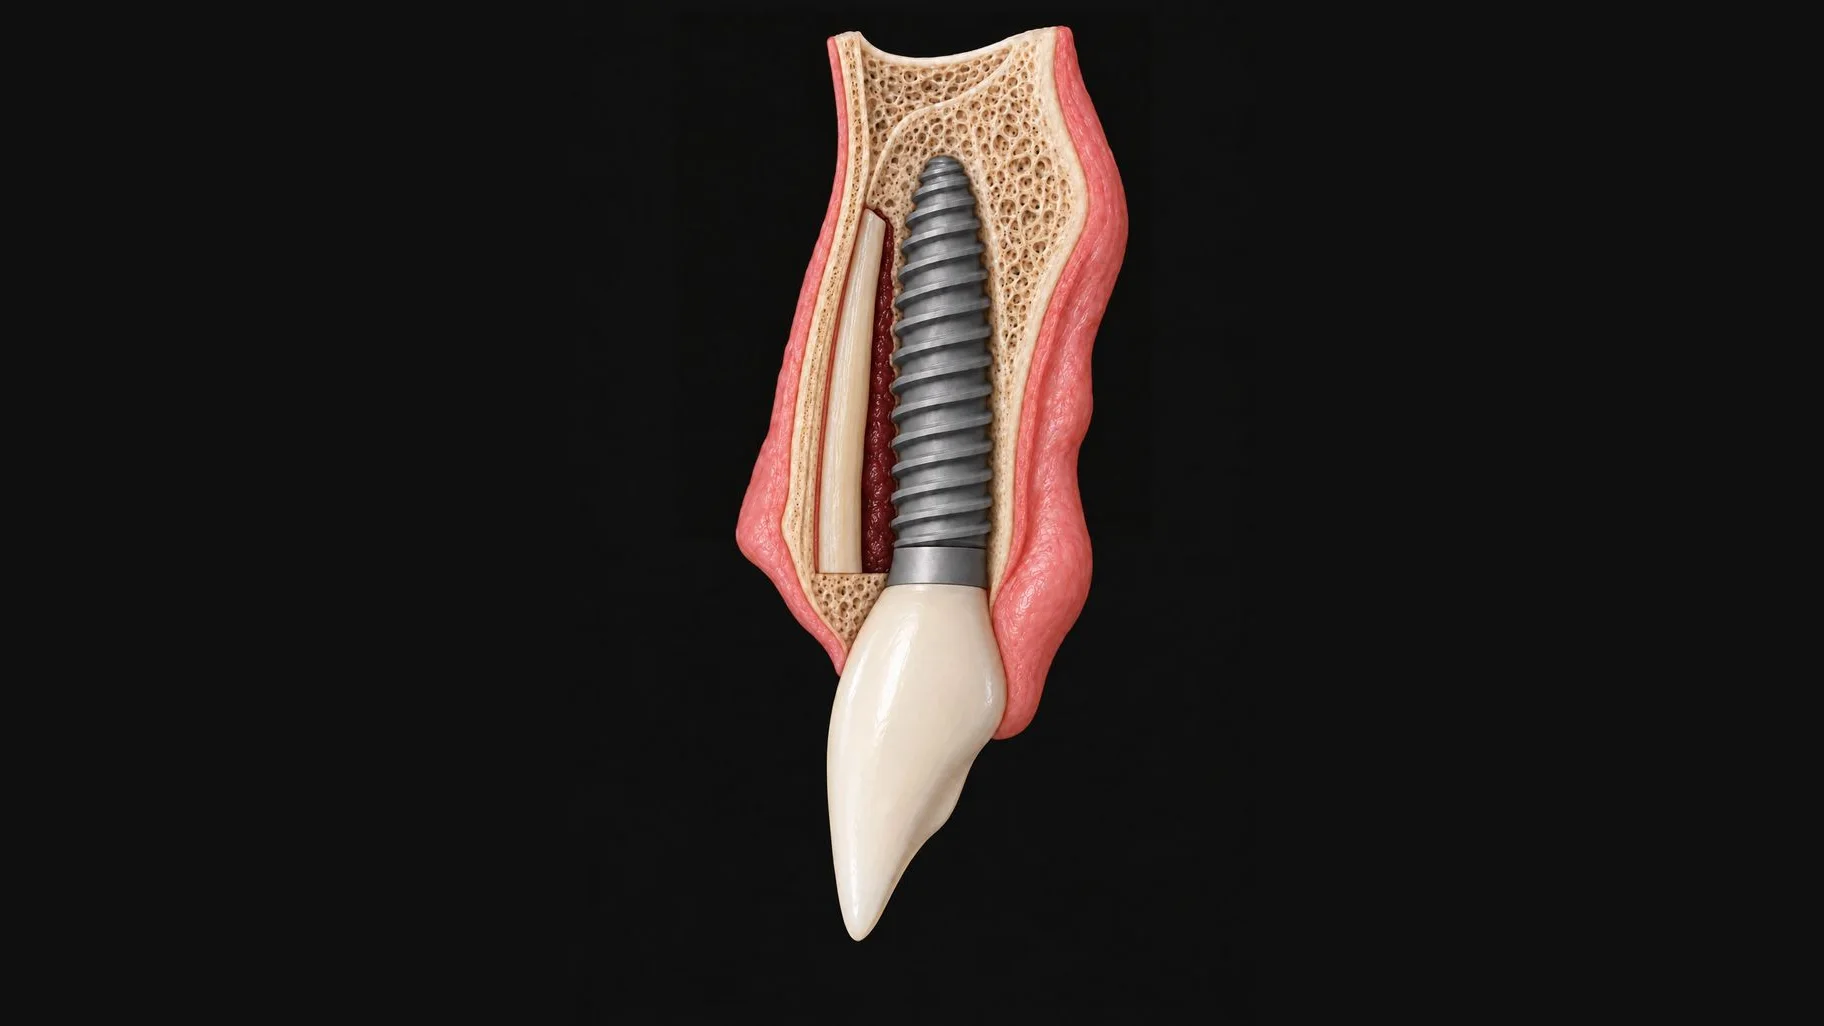
The buccal wall of an anterior socket is mostly bundle bone, and bundle bone lives on the periodontal ligament. Take the tooth out and its blood supply goes with it.
The idea behind the socket shield is simple: if the periodontal ligament on the buccal side stays, the bundle bone it feeds has a reason to stay too. You keep a thin slice of the root on the buccal side and place the implant palatal to it.
The first report was small: one dog with four implants, and one human case (Hürzeler et al. 2010). The buccal plate stayed, and the implant still integrated. A second study in three dogs with twelve implants found new bone, not cementum, between the shield and the implant (Bäumer et al. 2015). A promising start, not proof.
Case selection
Is this a socket shield case?
My own rule: the buccal part of the root must be healthy and intact. If you are not sure, it is not a socket shield case. Tick what applies below.
Before the technique, the selection
Is this a socket shield case?
Tick what applies to the tooth in front of you.
The "any of these" list follows Mitsias et al. 2017. Published lists disagree: one review counts a vertical fracture as an indication, the first human case was a vertical fracture, and Gluckman and colleagues accept roots with apical pathology (Ogawa et al. 2022; Hürzeler et al. 2010; Gluckman et al. 2016).
The case
The case, step by step
1The first visit: a crown that needed re-cementing. Or so we thought
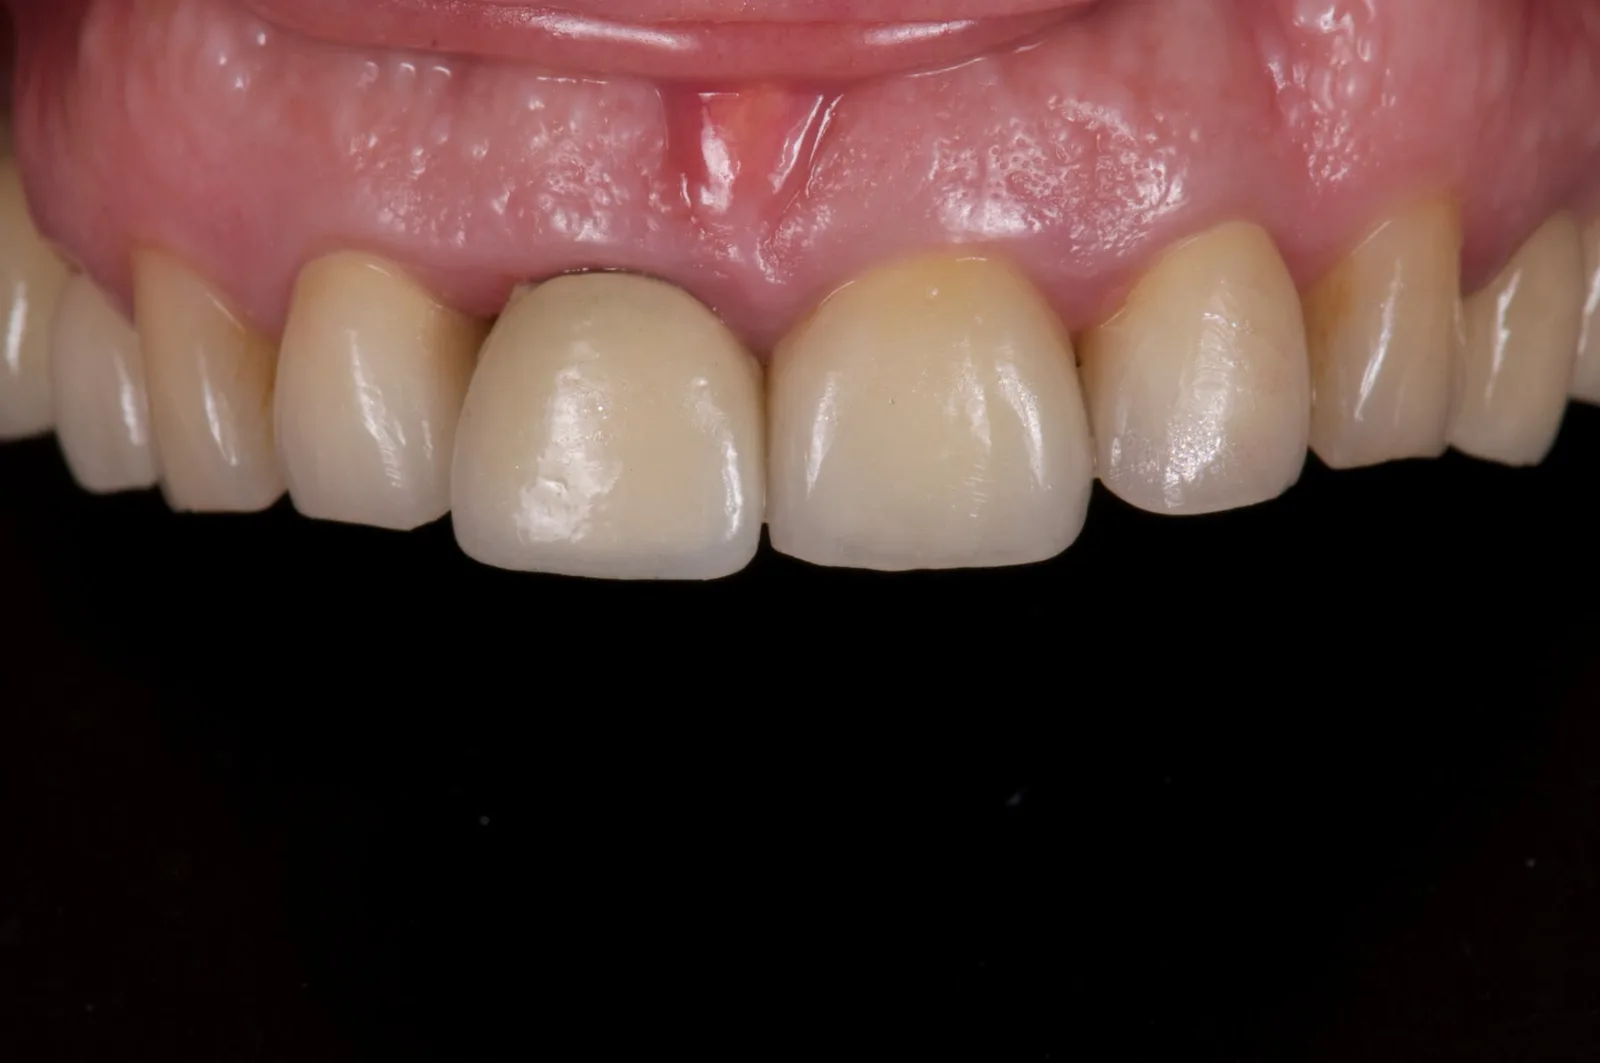
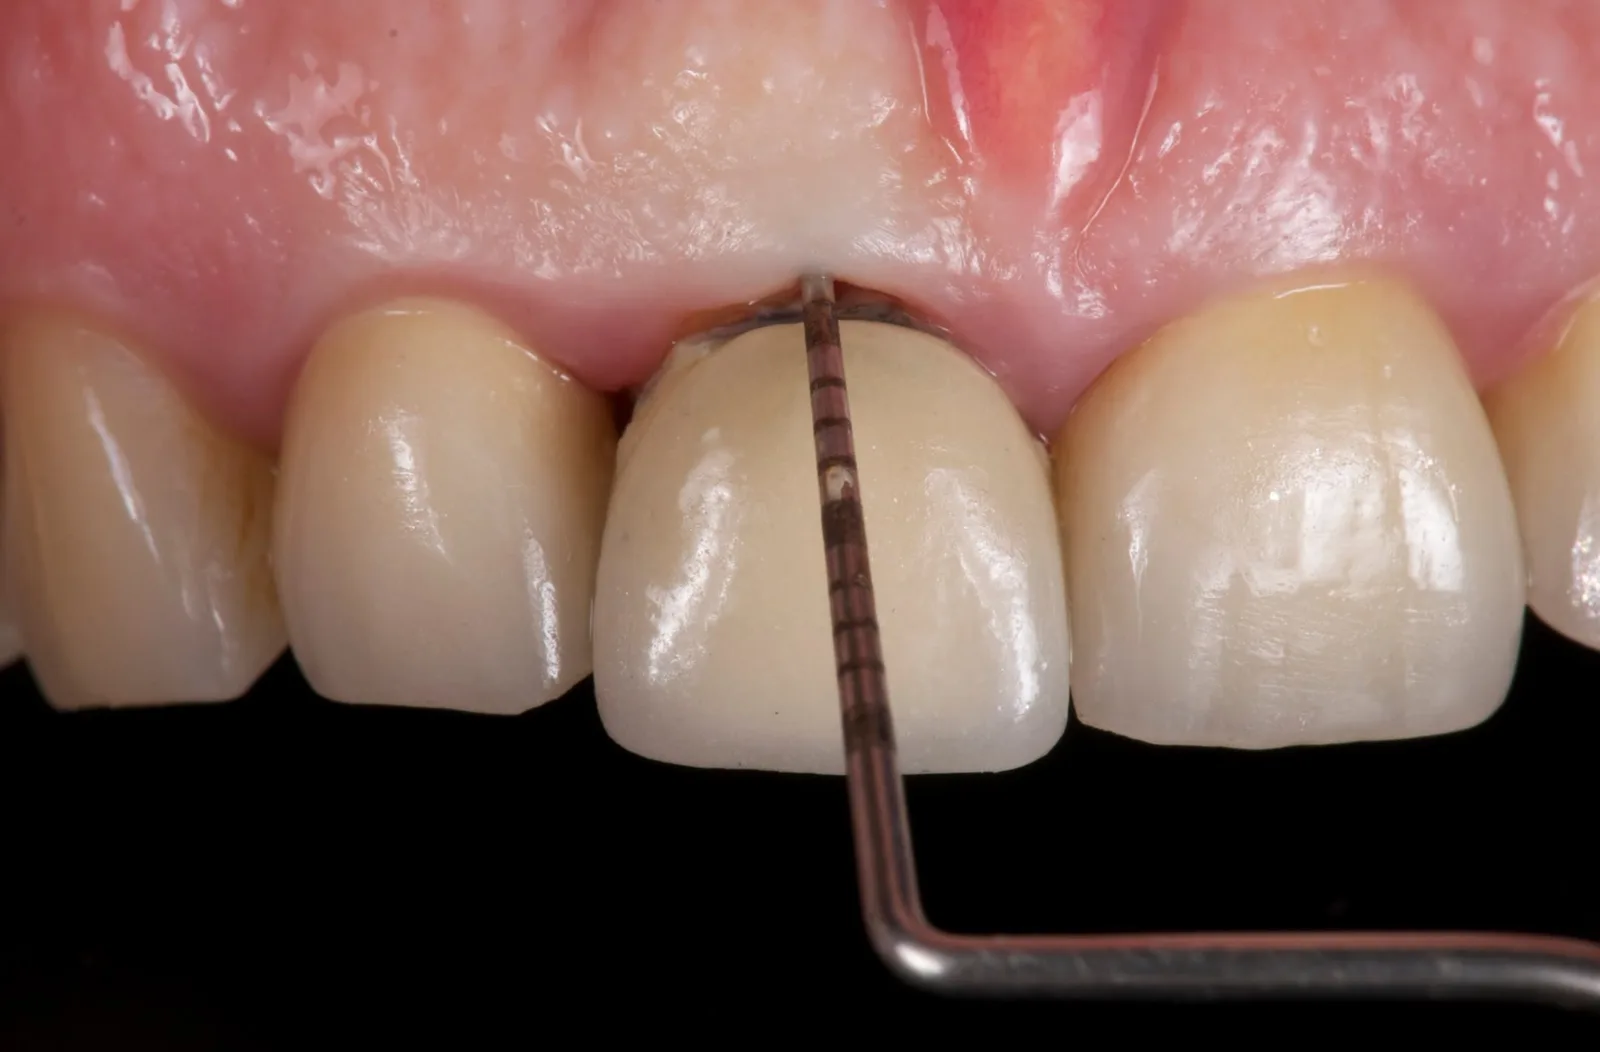
The crown on the upper right central incisor (11) had a cementation problem. The periodontal probe found a gap between the crown and the root. Once the crown came off, there was no doubt: a horizontal fracture. The fracture line was at the bone level, not below it, so the buccal part of the root could stay.
The smile tells you the rest of the risk: a high lip line that shows the gingival margins.
2Showing the patient the goal
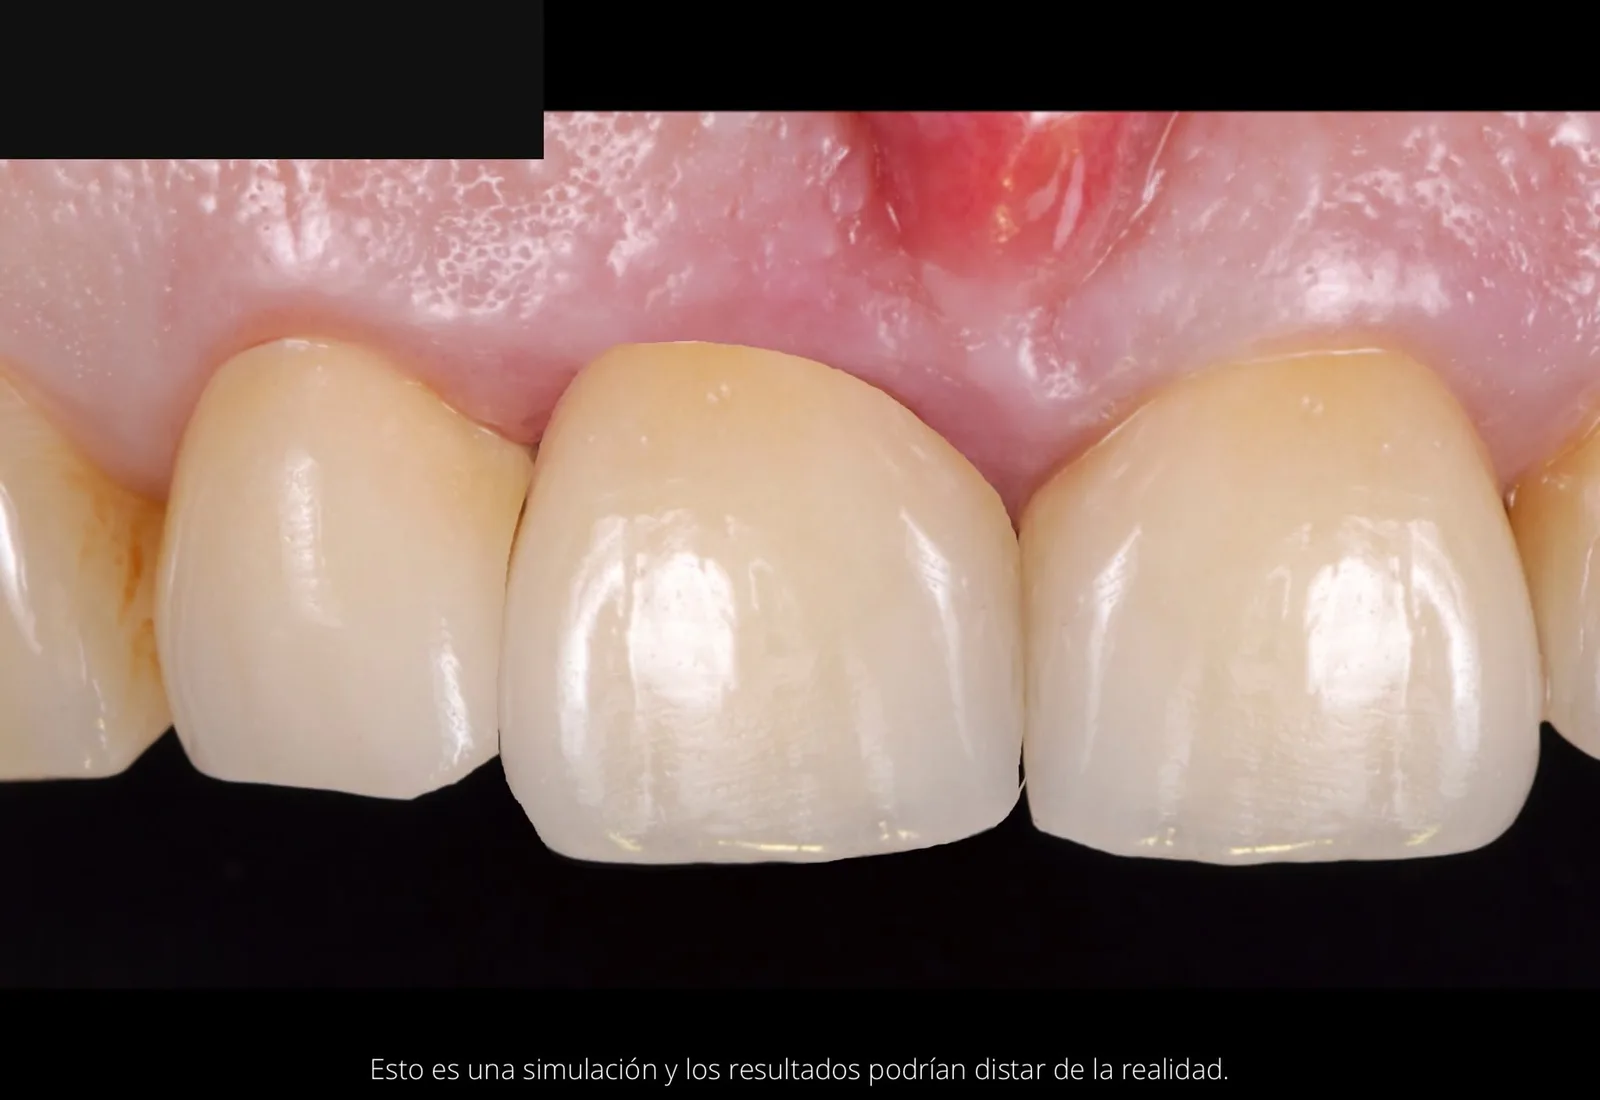
Before we touched anything, the patient saw a digital simulation of the final result. It is a simulation, not the outcome, but it sets expectations for both of you before the first cut.
 Simulation
3Planning the implant depth
The gingival margin of the future crown is the reference, and the implant platform goes 4 mm below it. With a 13 mm implant, that means drilling 17 mm from the margin: always the implant length plus the platform depth.
4Sectioning the tooth and removing the palatal fragment
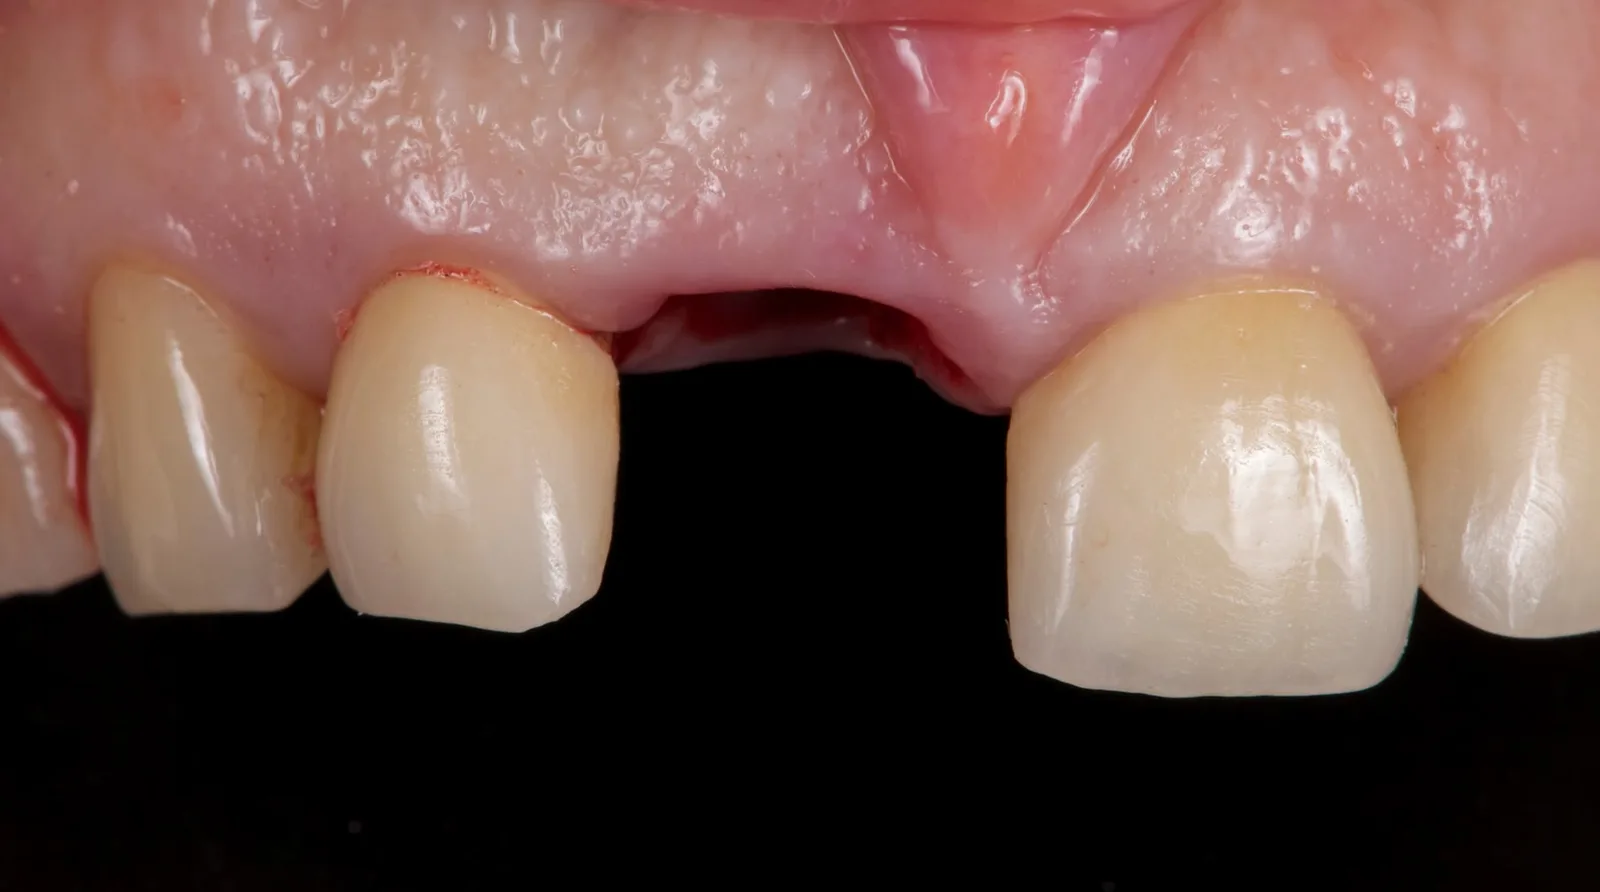
The tooth was sectioned and the palatal fragment removed. The buccal part stays, and it becomes the shield.
5Preparing the shield
The shield was reduced and shaped, and I made sure no apical portion of the root was left behind.
How high to leave it is still an open question. A 2025 meta-analysis found less buccal bone loss with a socket shield than with a conventional immediate implant whether the shield sat above, at or below the bone crest. It did not compare the heights with each other, and it says the ideal height is not settled (Lu et al. 2025). Gluckman and colleagues link shields left above the crest to internal exposure, and they now reduce the shield to the crest (Gluckman et al. 2019). In this case I finished it about 0.5 mm below the bone crest.
Watch this step in the video: chapter “Shield preparation”, from 2:28.
6Drilling: slow, and without water after the first drill
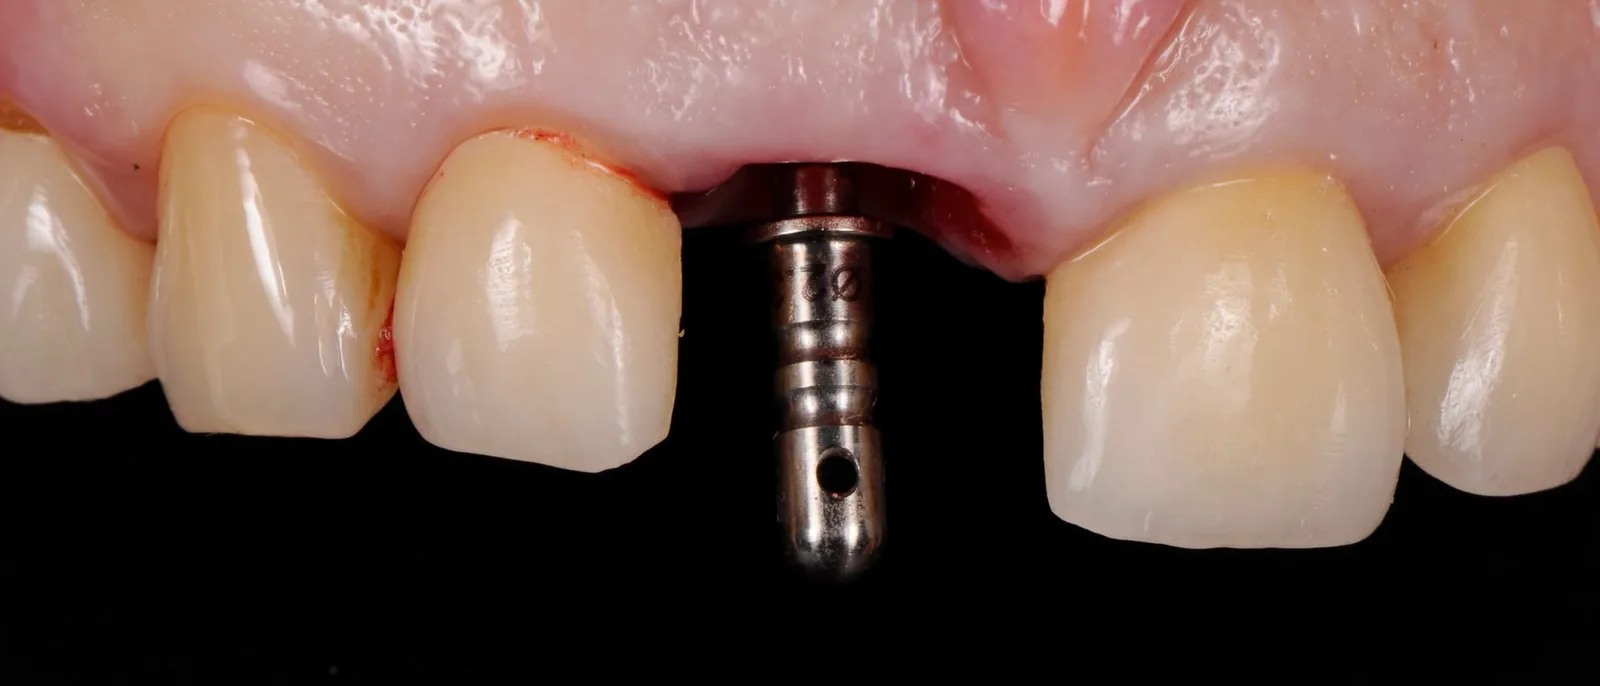
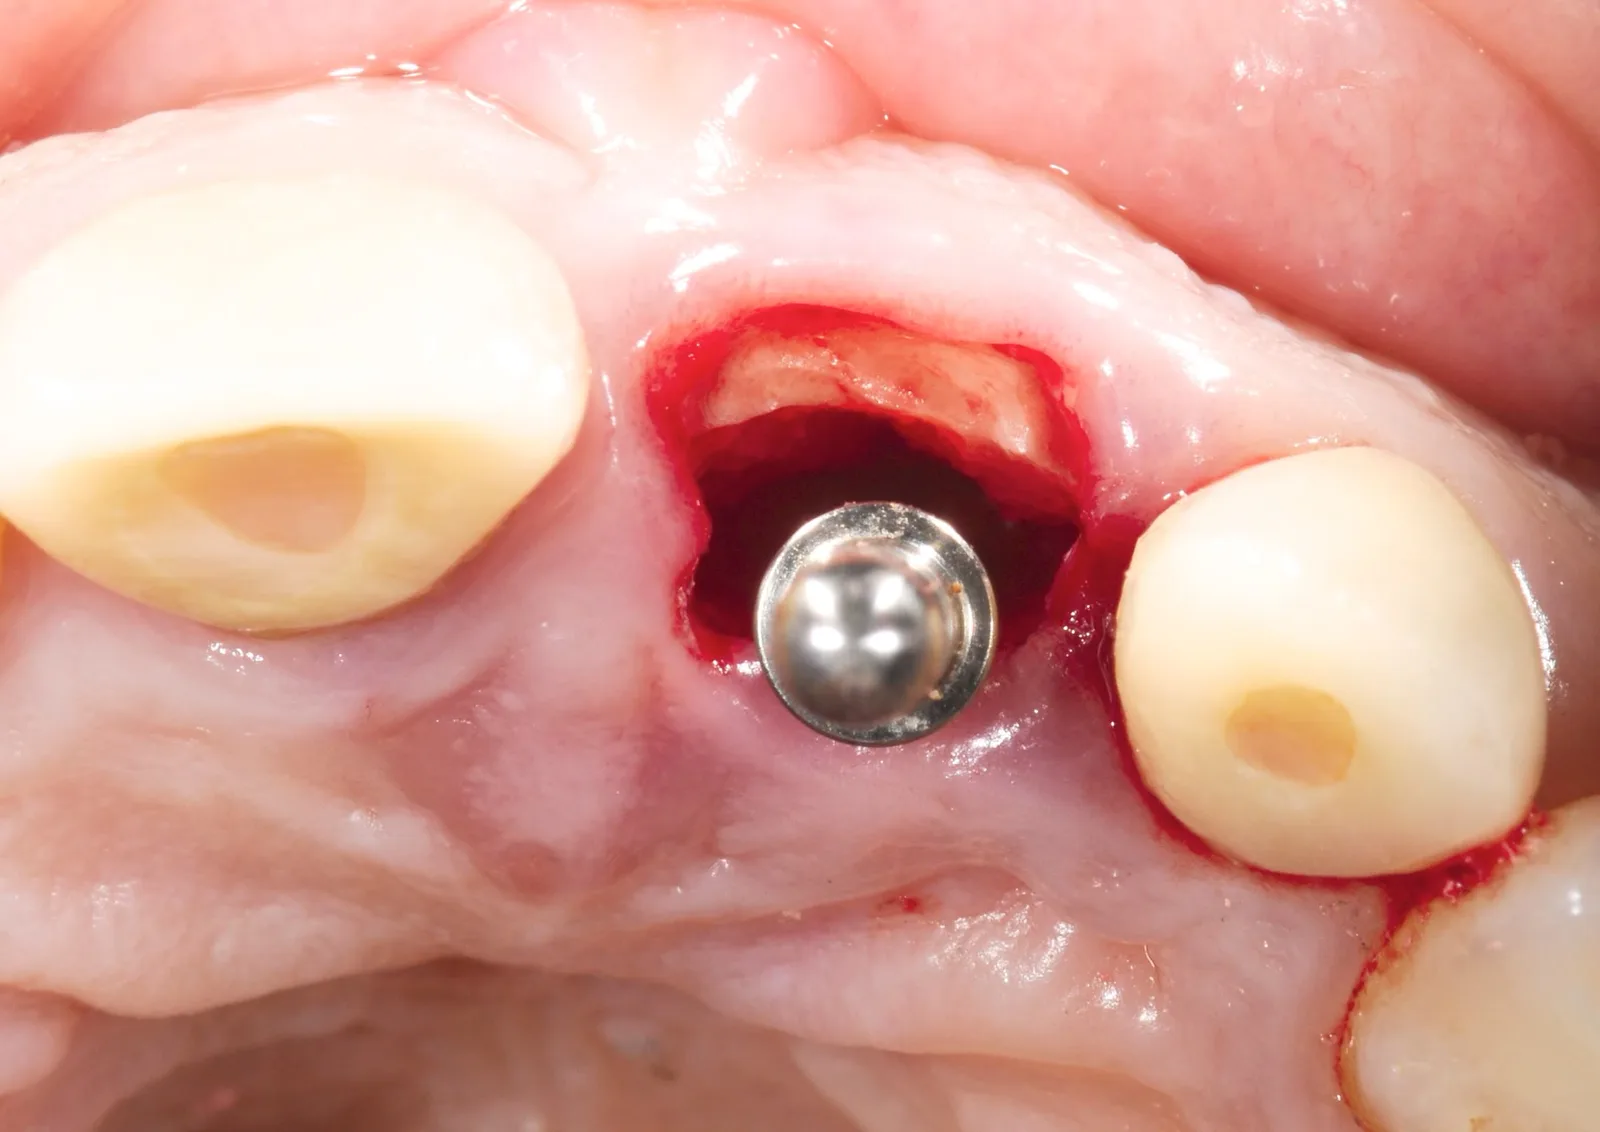
Biological drilling at low speed without irrigation, the idea Anitua and colleagues described in 2007: after a first drill with water, the drills turn slowly with no water, which also lets you collect the bone chips. Their paper used 50 rpm. In this case the starting drill ran at 1,100 rpm with water, and the pilot drill at 125 rpm without water. I checked the direction with the pin before the final drill.
Back then I also applied Emdogain on the inner surface of the shield, as in the first socket shield report (Hürzeler et al. 2010). I no longer use it today.
Watch this step in the video: chapter “Biological drilling”, from 5:29.
7Placing the implant, gently
The implant went in palatal to the shield, in slight contact with it. The ISQ was 72 (Osstell). My threshold for an immediate provisional: an ISQ above 60.
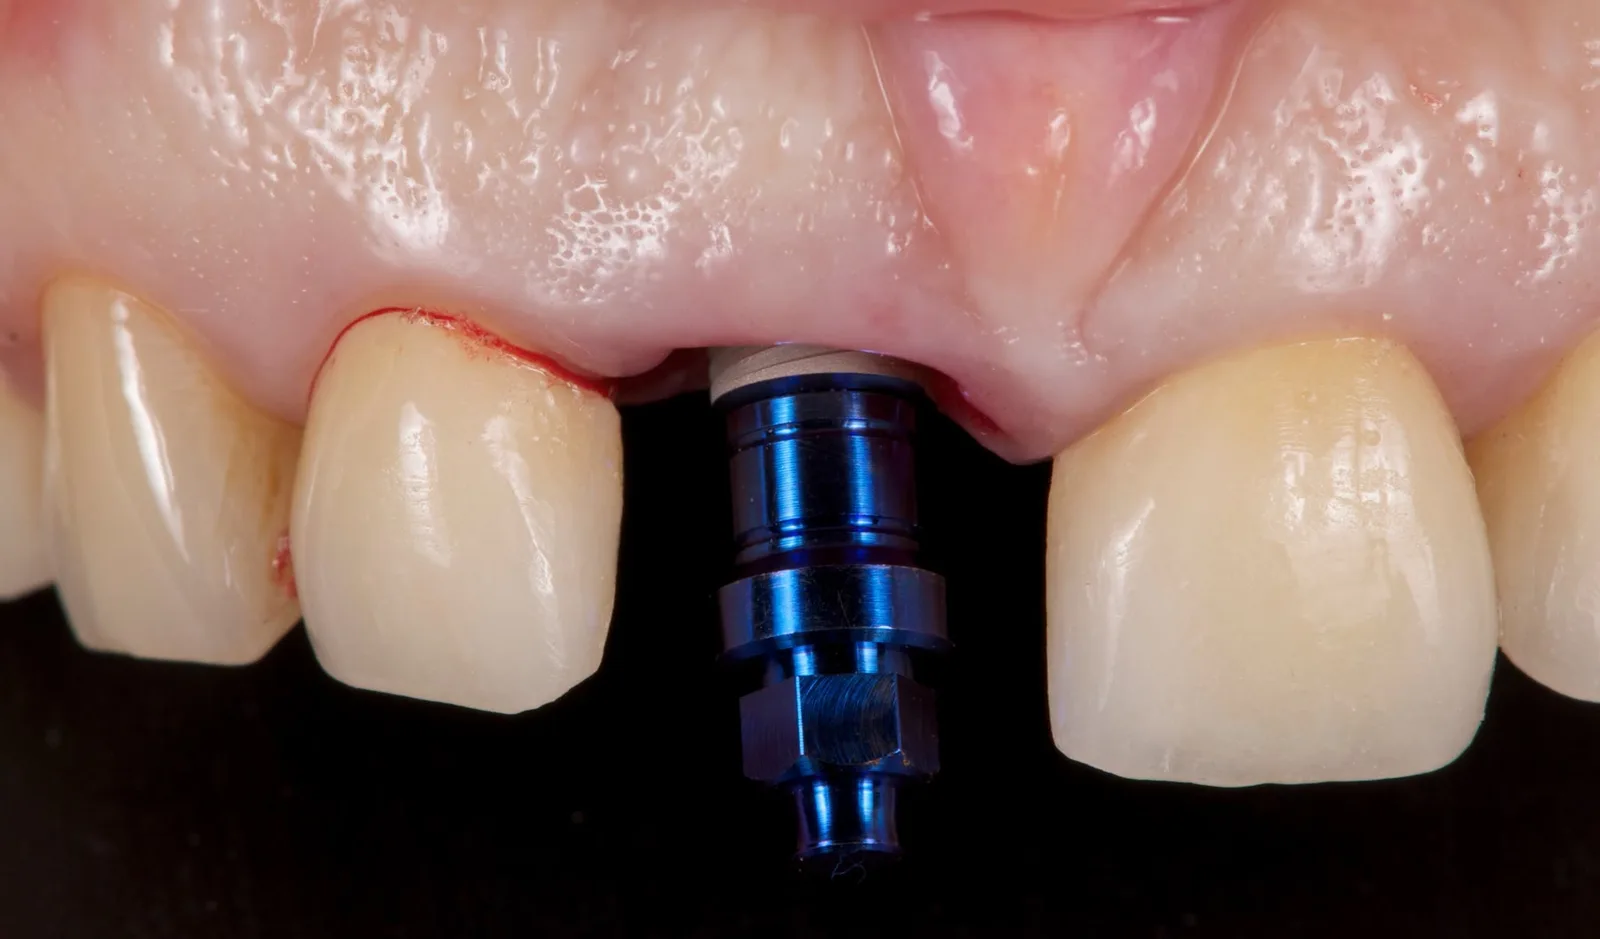
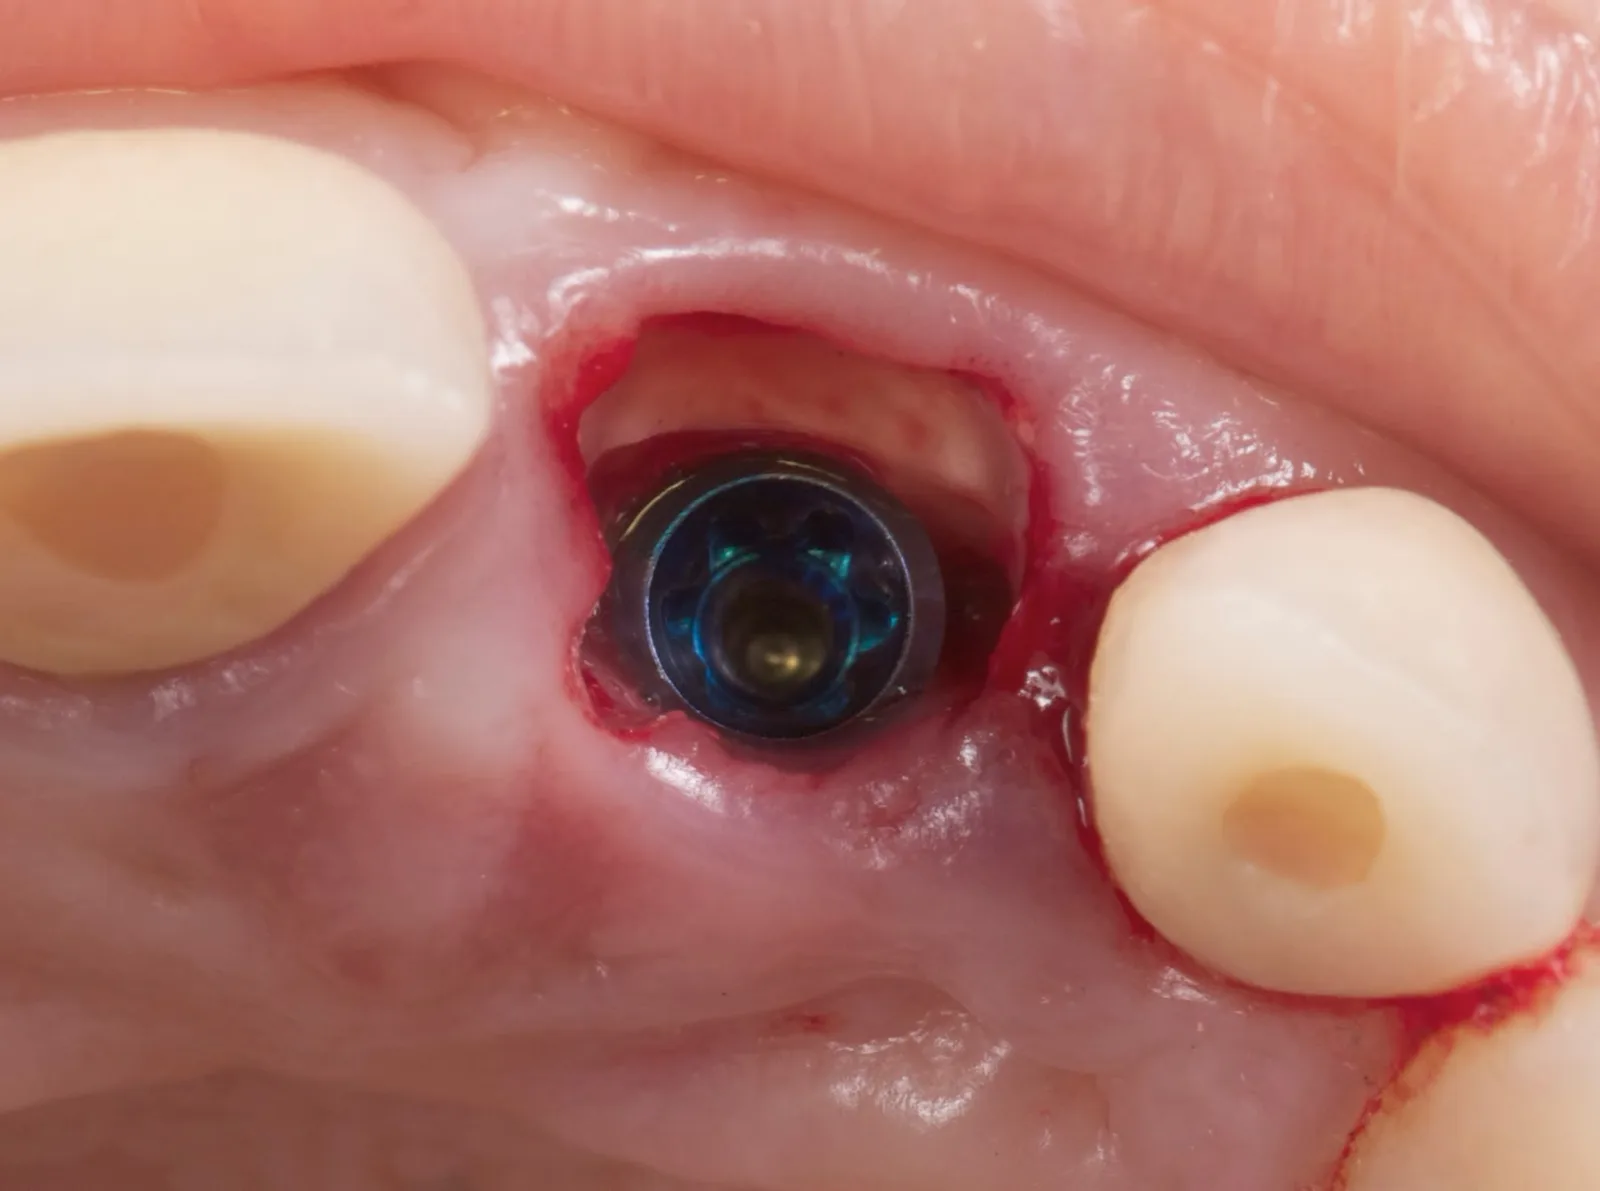
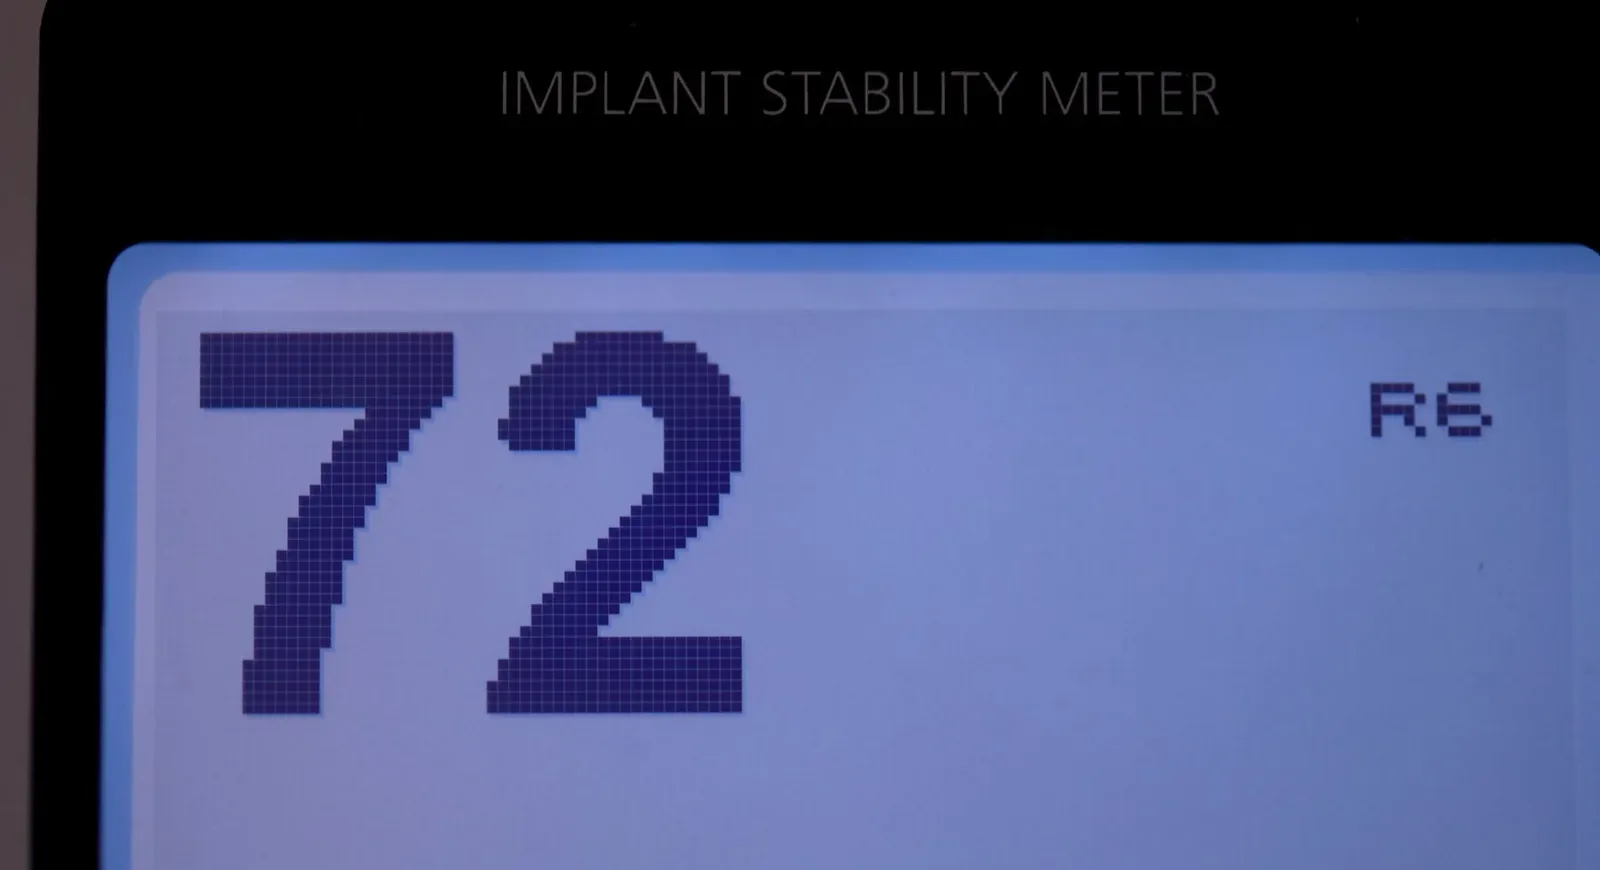
Watch this step in the video: chapter “Implant placement”, from 7:26.
8The digital impression and the provisional
The same day I scanned with a Trios 2. The shield is visible on the scan, so the provisional can be designed with no contact against it.
The CAD/CAM milled PMMA provisional went in 72 hours after surgery. The patient liked it from day one.
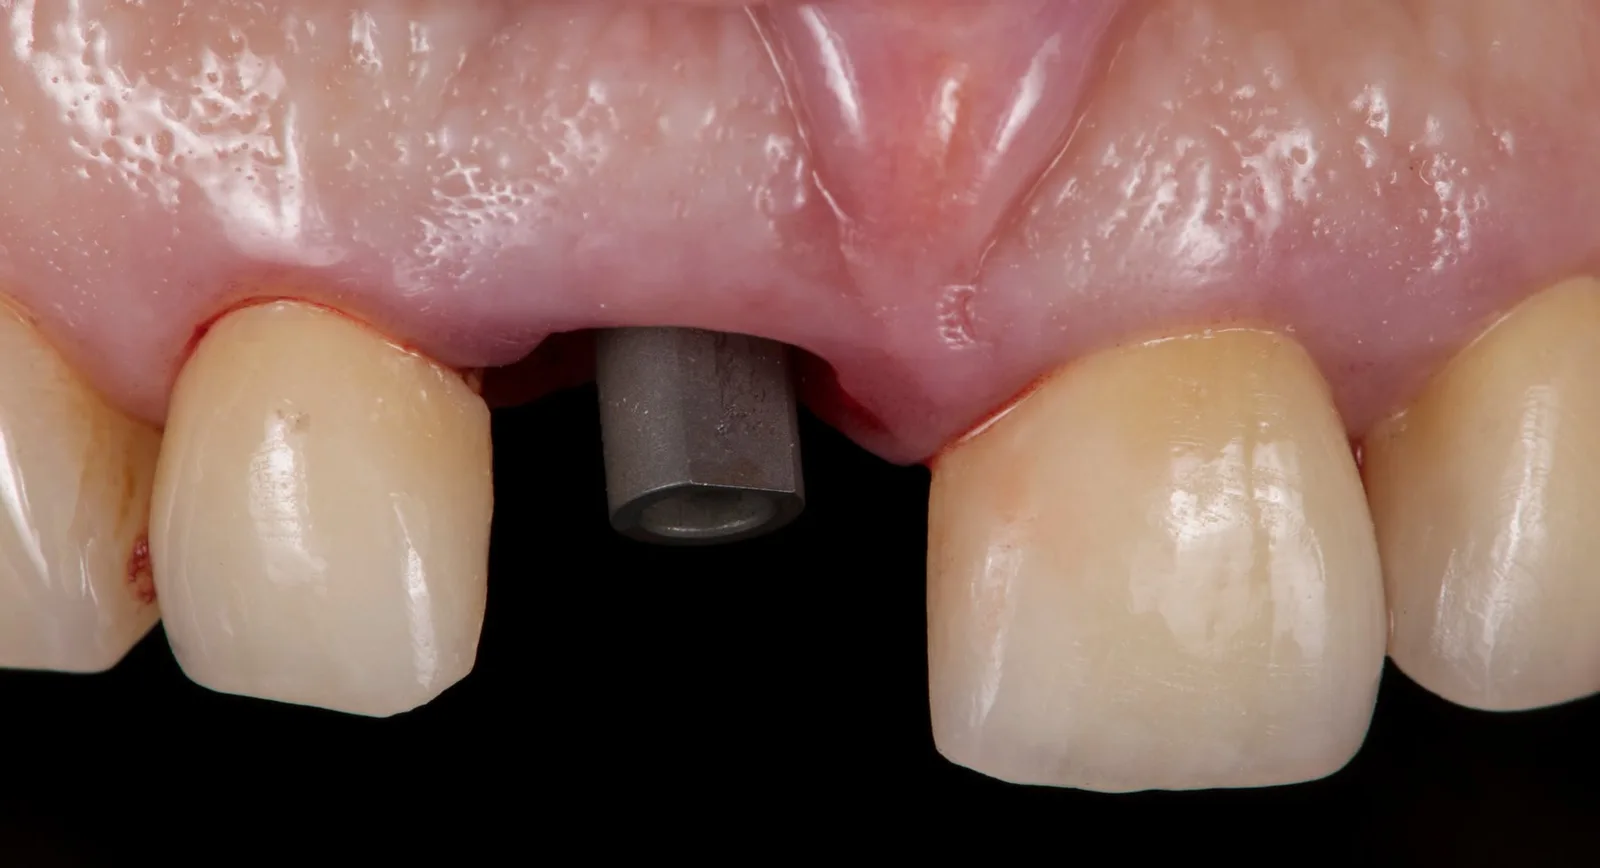
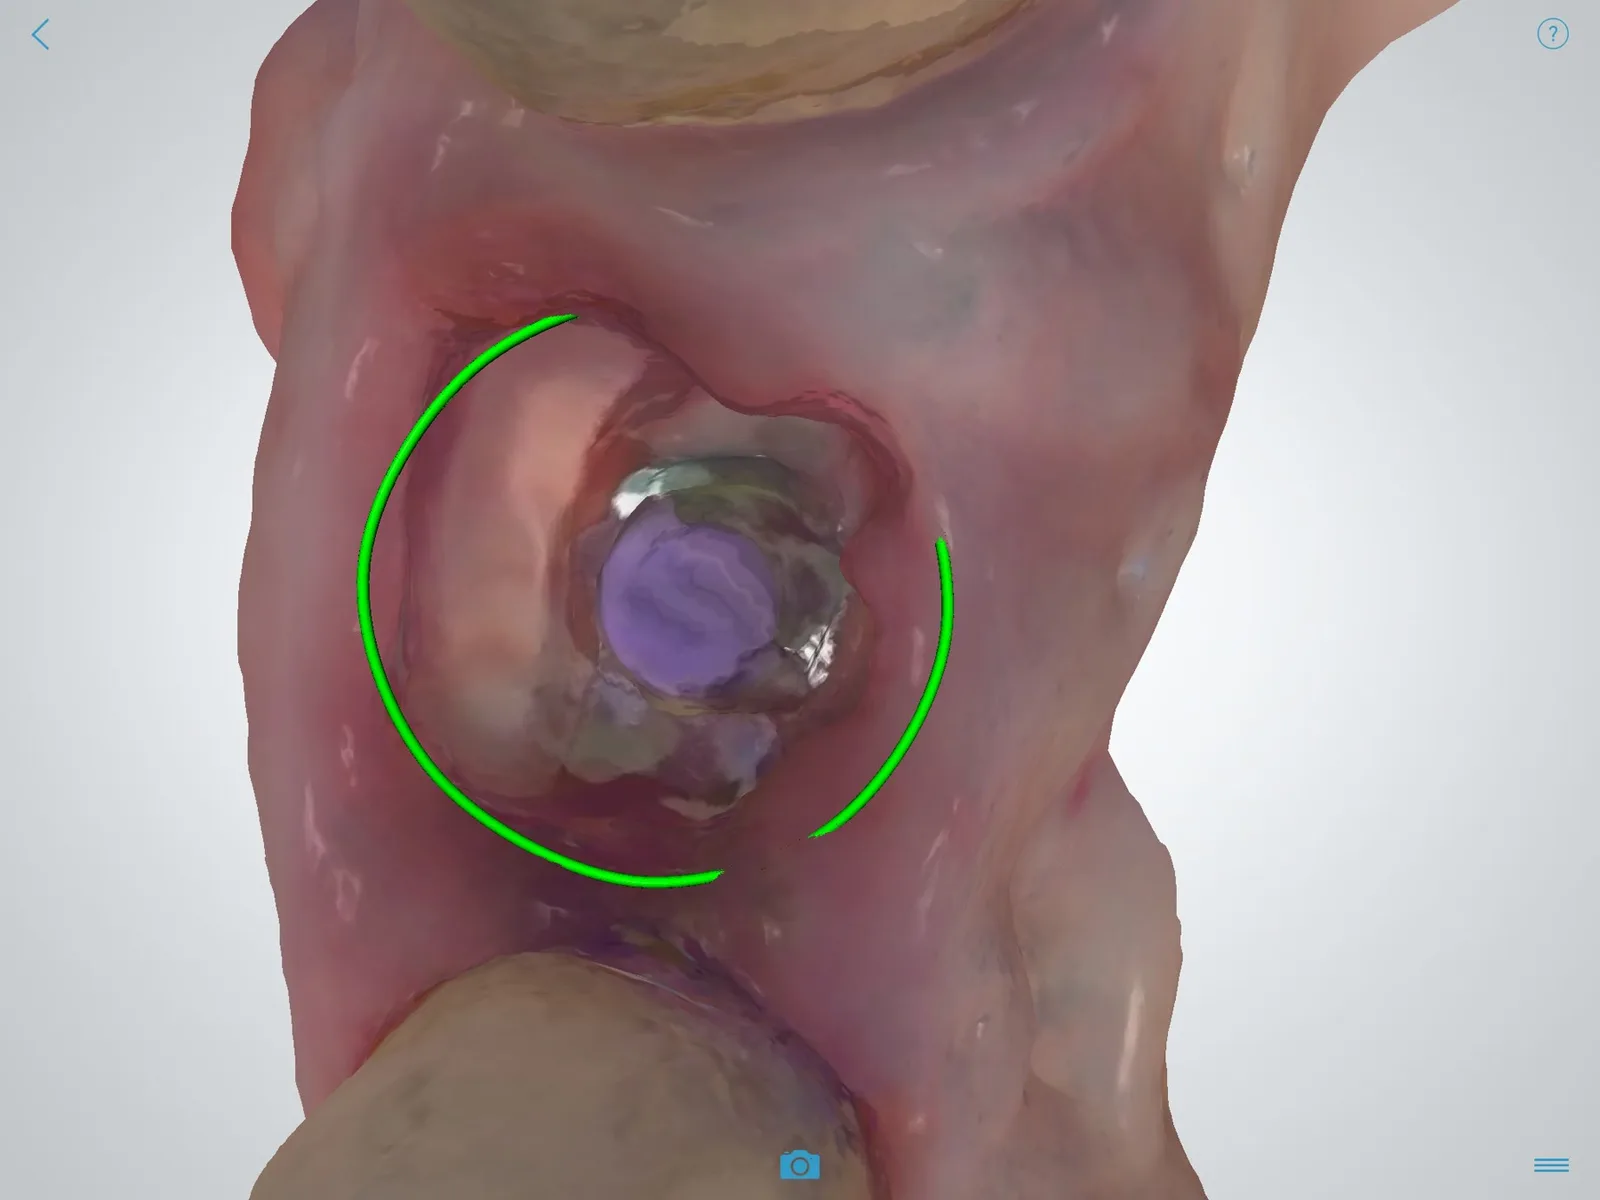
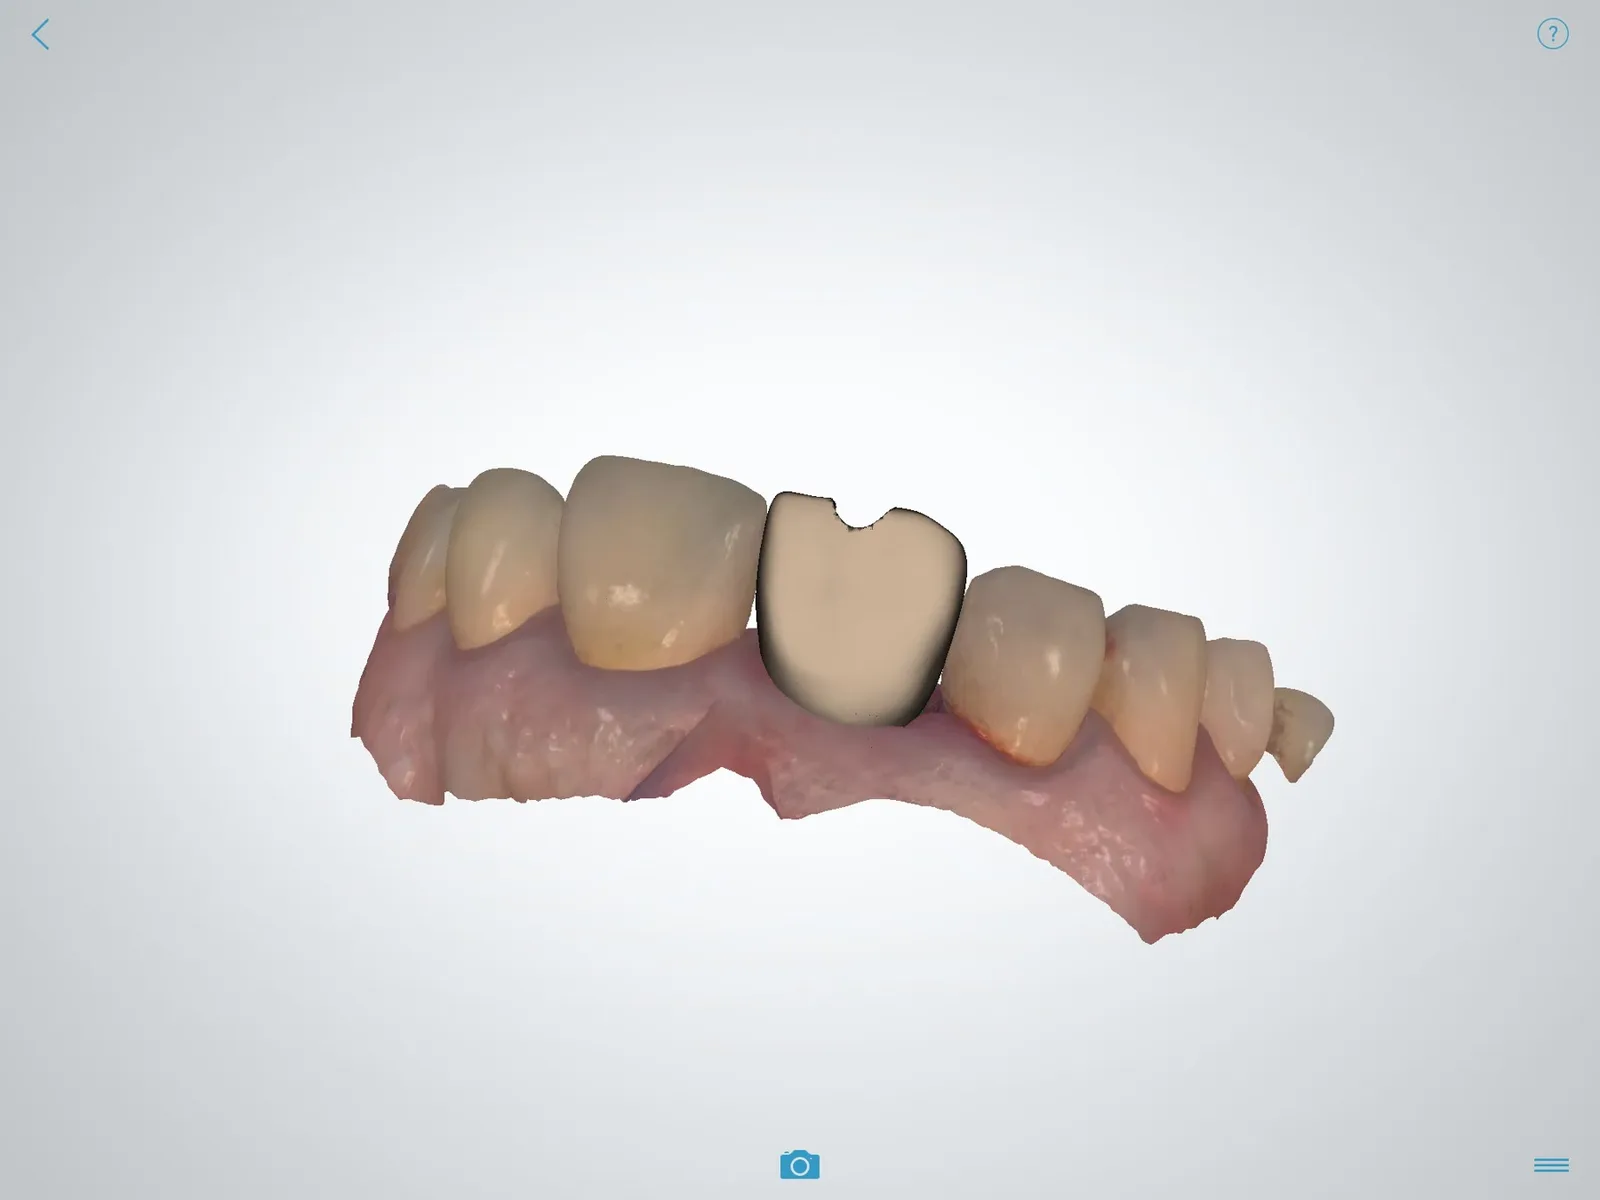
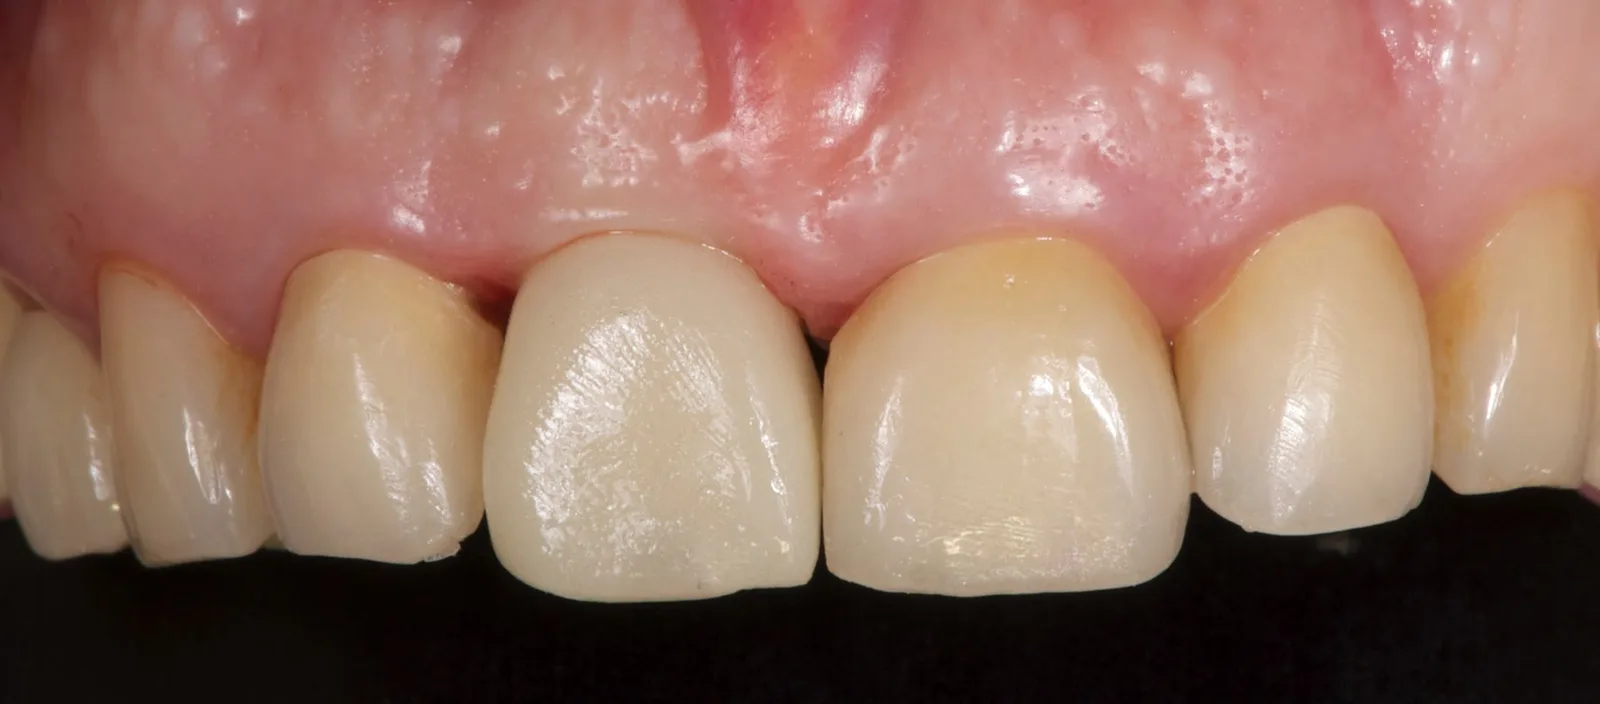
Watch this step in the video: chapter “Scan to final crown”, from 8:44.
9Four months later
When I removed the provisional at four months, the soft tissue was stable and well shaped, ready for the final crown. Final impression with the scan body.
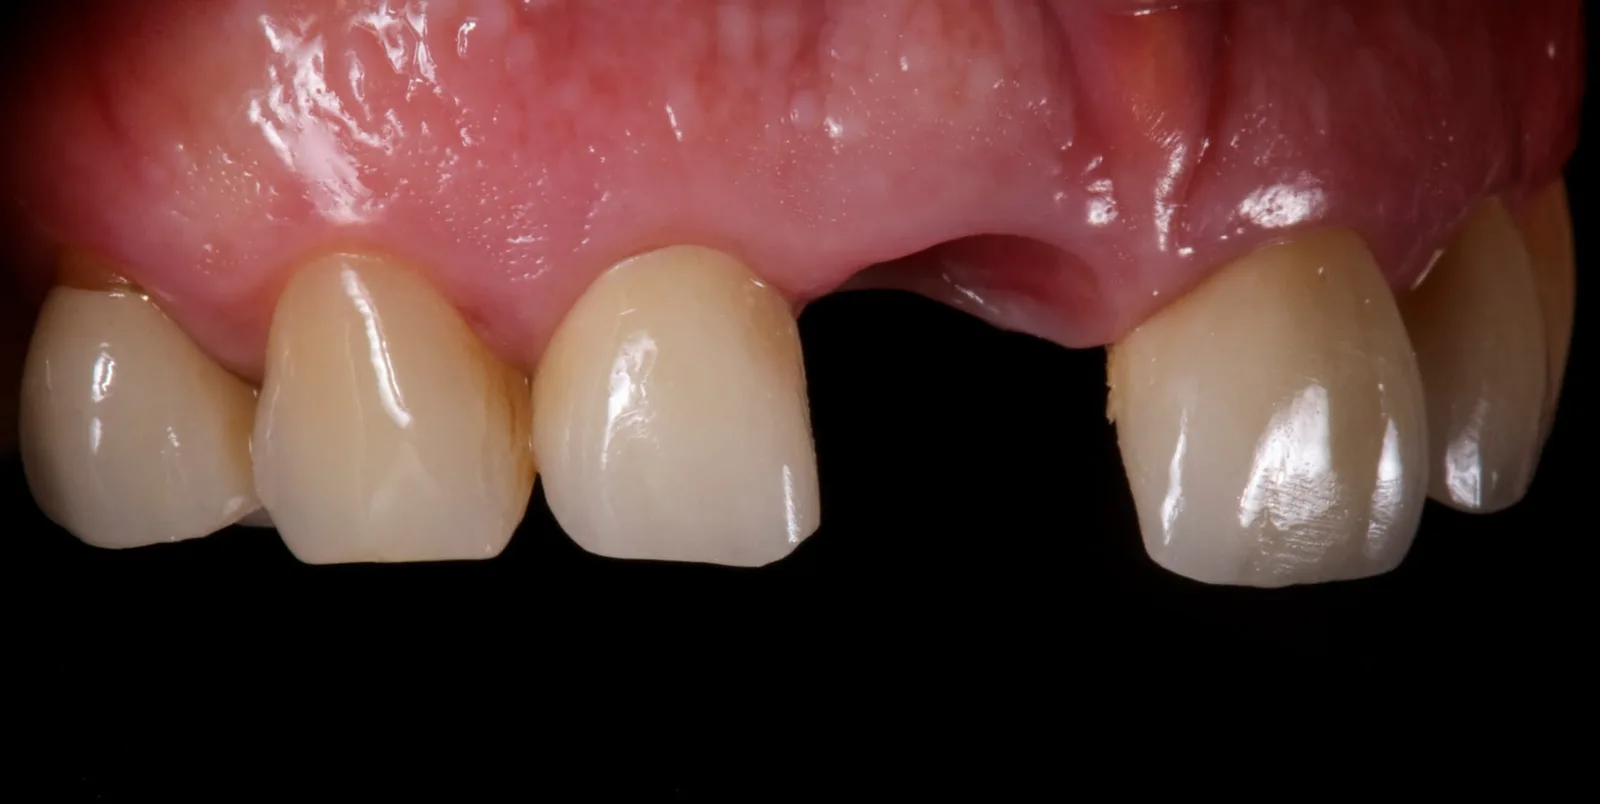
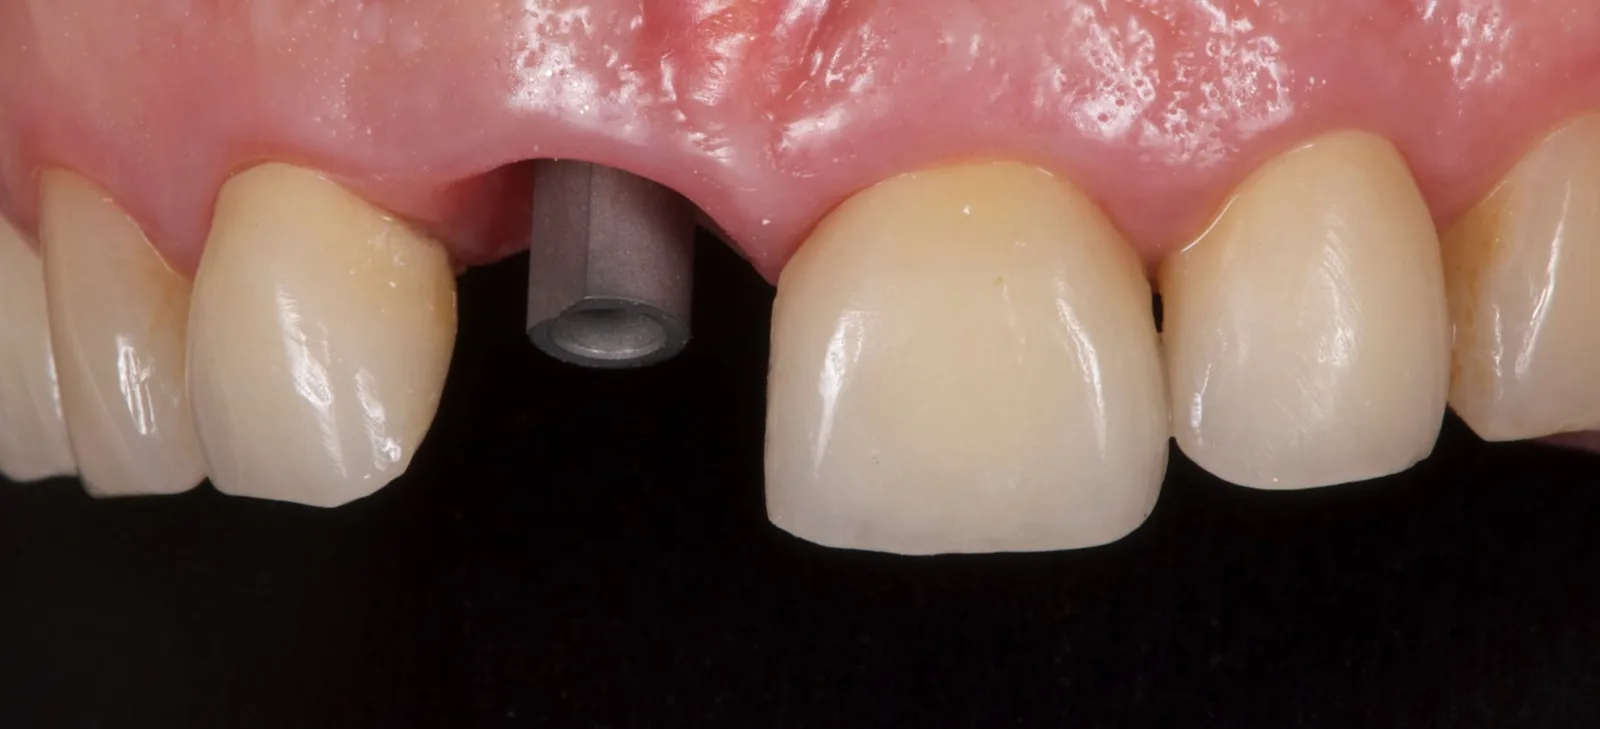
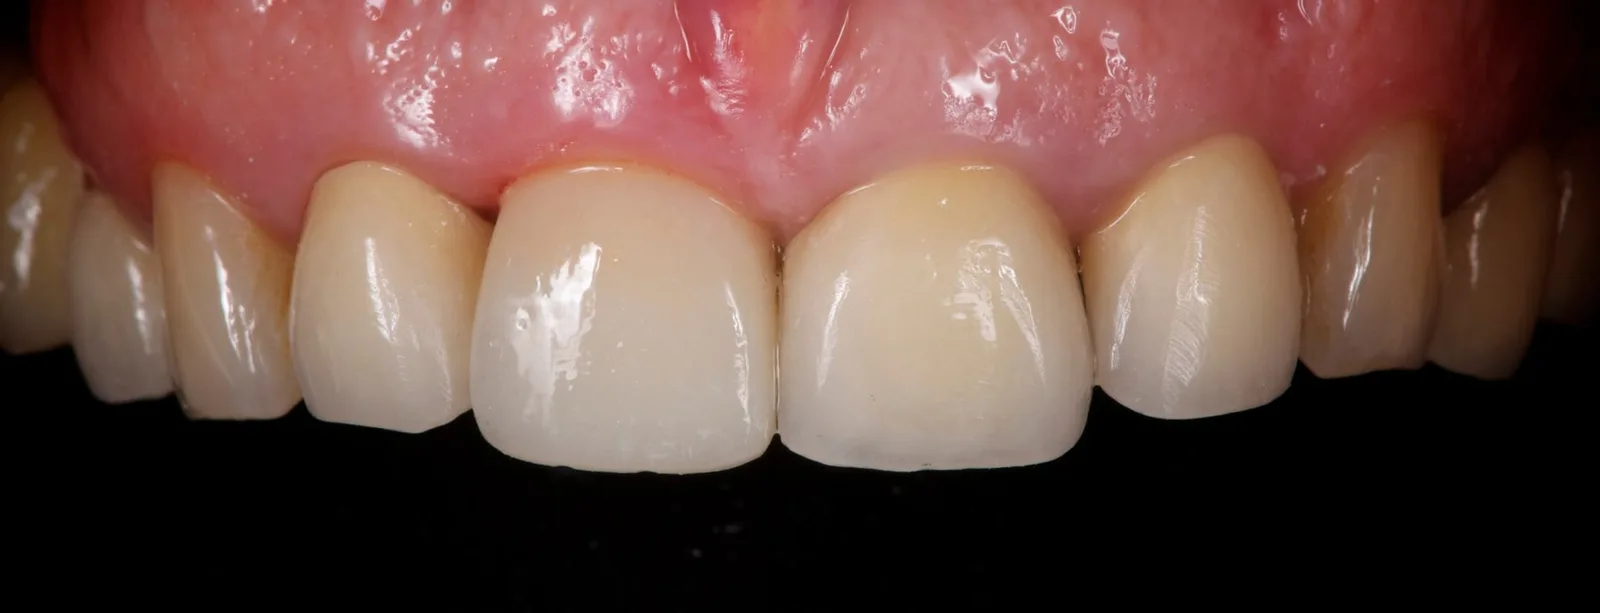
10The abutment and the final crown
A zirconia abutment with its margin about 0.5 mm below the gingiva, so any excess cement stays where I can see it and remove it. Then the definitive crown.
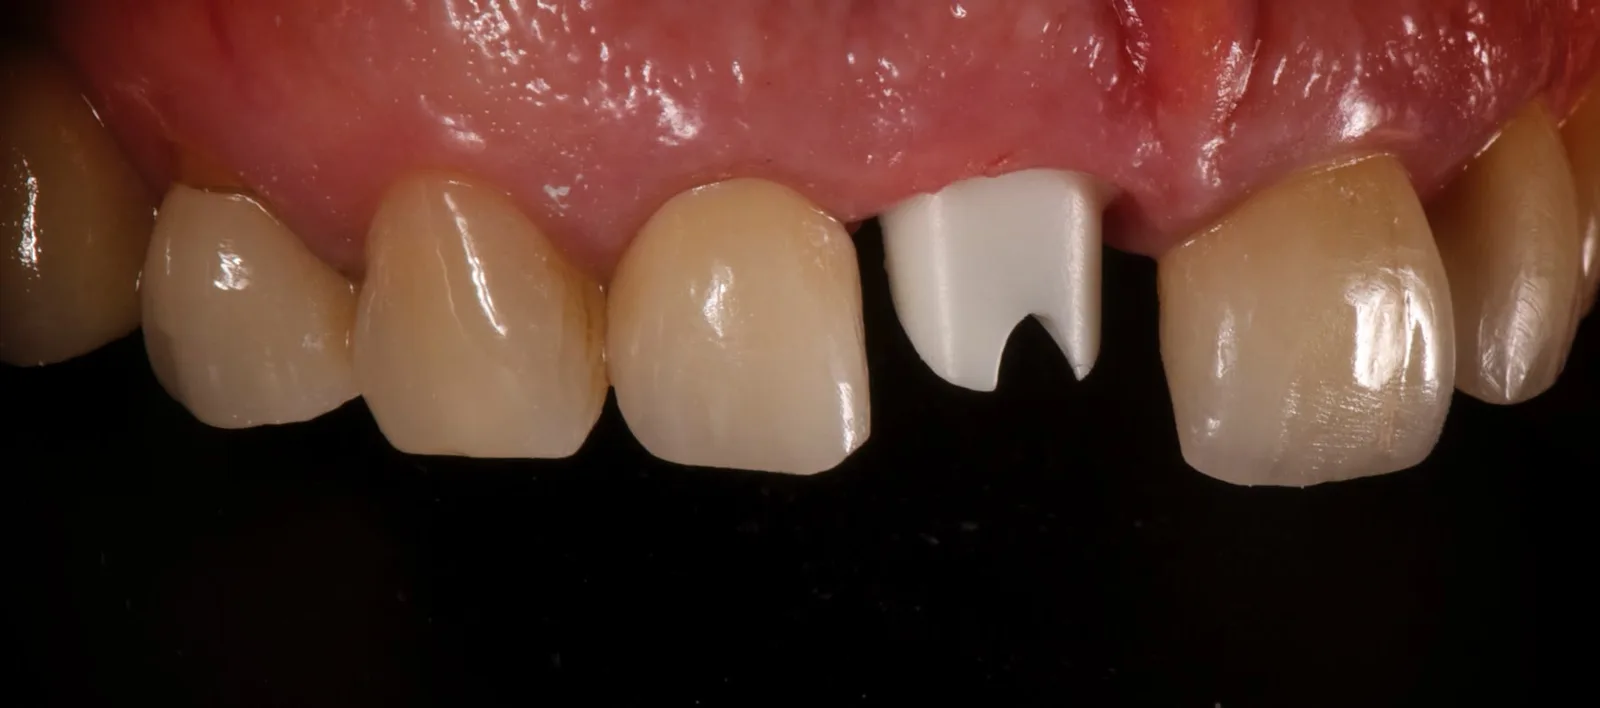
From my other cases
The torque lesson
The failures came when the insertion torque was high and the implant was pressed hard against the shield. Slight contact is one thing. Forcing the implant against the root fragment is another. In this case: slight contact, ISQ 72.
Follow-up
Measuring the result instead of guessing
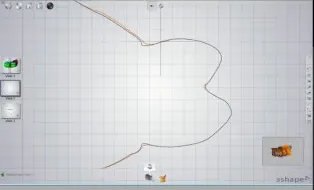
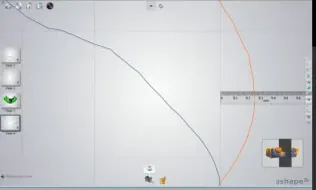
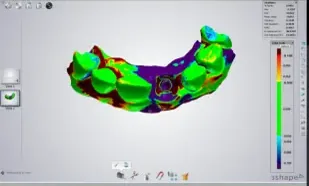
I overlaid the STL files on the molars and premolars, so that only the implant site could change, and compared the soft tissue volume at 4 months and at 1 year. There was almost no change.
Ten years on
What I do differently today
- No Emdogain on the shield.
- No high insertion torque, and no pressure against the shield.
- Choose your first socket shield patient with care. My old rule still stands: your first case should be your mother-in-law. And if a two-metre gym fan is waiting outside for your patient, pick another case to learn on.
The literature
What the evidence says
One case proves nothing on its own. Here is what the reviews of 2022 to 2025 report, each number from a paper read in full. Pick a topic.
What the papers say, in plain numbers
The evidence board
438 of 439
Socket shield implants counted as a success in the trials, against 441 of 444 conventional immediate implants.
Lu et al. 2025, 18 studies
647 of 656
Implants still in place across 17 studies, at an average of only 18 months.
Oliva et al. 2023, Table 2
96.5%
Survival at 10 years, counted per patient, in one cohort of 182 patients with 250 implants. A 10-year estimate: patients were followed for about 4 years on average.
Siormpas et al. 2018
87.9%
Success at 10 years in the same cohort, counted per patient, once mechanical and biological complications are counted too.
Siormpas et al. 2018
No difference in the short term. Long-term data are thin: most trials stop at 12 months.
Questions colleagues ask
Can the implant touch the shield?
In this case it was in slight contact. In my failed cases the torque was high and the implant was pressed against the shield. Avoid high torque and do not force it. A small retrospective study points the same way: in 31 implants at neighbouring front-tooth sites, exposures were more frequent when the shield touched the implant, 40.0% against 12.5% without contact (Chen et al. 2023). That is an association in a small group, not proof.
Is 98.6% survival the real number?
That figure comes from a 2023 review: 647 of 656 implants were still in place, but at an average of only 18 months (Oliva et al. 2023). A cohort of 182 patients with 250 implants reports 10-year estimates: 96.5% survival and 87.9% success at 10 years, counted per patient and estimated from an average follow-up of about 4 years (Siormpas et al. 2018). Quote each number with its time frame.
What if the shield gets exposed?
Internal exposure is the most common complication: about 9 in every 100 shields in a series of 128 implants followed for 1 to 4 years (Gluckman et al. 2018). The same group now reduces the shield to the bone crest to prevent it (Gluckman et al. 2019).
How long until the final crown?
In this case, four months with the provisional, then the final scan.
Go further
Recommended book
Book · Springer, 2020Partial Extraction Therapy in Implant DentistryEdited by Udatta Kher and Ali Tunkiwala. The first book dedicated to partial extraction therapy: 11 chapters, from the step-by-step socket shield protocol to case selection, provisionals, pontic sites, complications and failures.This section contains an affiliate link. If you buy through it, Periospot may earn a small commission at no extra cost to you.
Source register
References
- Hürzeler MB, Zuhr O, Schupbach P, et al. The socket-shield technique: a proof-of-principle report. J Clin Periodontol. 2010;37(9):855-862. PMID 20712701 DOI
- Bäumer D, Zuhr O, Rebele S, et al. The socket-shield technique: first histological, clinical, and volumetrical observations after separation of the buccal tooth segment. A pilot study. Clin Implant Dent Relat Res. 2015;17(1):71-82. Published online April 2013. PMID 23631704 DOI
- Anitua E, Carda C, Andia I. A novel drilling procedure and subsequent bone autograft preparation: a technical note. Int J Oral Maxillofac Implants. 2007;22(1):138-145. PMID 17340908
- Gluckman H, Salama M, Du Toit J. Partial extraction therapies (PET) part 1: maintaining alveolar ridge contour at pontic and immediate implant sites. Int J Periodontics Restorative Dent. 2016;36(5):681-687. PMID 27560672 DOI
- Gluckman H, Salama M, Du Toit J. A retrospective evaluation of 128 socket-shield cases in the esthetic zone and posterior sites: partial extraction therapy with up to 4 years follow-up. Clin Implant Dent Relat Res. 2018;20(2):122-129. PMID 29178381 DOI
- Gluckman H, Nagy K, Du Toit J. Prosthetic management of implants placed with the socket-shield technique. J Prosthet Dent. 2019;121(4):581-585. PMID 30554825 DOI
- Mitsias ME, Siormpas KD, Kotsakis GA, et al. The root membrane technique: human histologic evidence after five years of function. Biomed Res Int. 2017;2017:7269467. PMID 29333449 DOI
- Ogawa T, Sitalaksmi RM, Miyashita M, et al. Effectiveness of the socket shield technique in dental implant: a systematic review. J Prosthodont Res. 2022;66(1):12-18. PMID 33692284 DOI
- Oliva S, Capogreco M, Murmura G, et al. The socket shield technique and its complications, implant survival rate, and clinical outcomes: a systematic review. J Periodontal Implant Sci. 2023;53(2):99-109. PMID 36468475 DOI
- Lu W, Du S, Su J, et al. Clinical efficacy of socket shield technique compared to conventional immediate implant placement in the aesthetic zone: a meta-analysis. Int J Implant Dent. 2025;11(1):72. PMID 41417433 DOI
- Thang NP, Ly NTK, Toan DTT, et al. The influence of different implant placement techniques on alveolar ridge preservation: a systematic review and meta-analysis. Eur J Dent. 2025;19(4):882-892. PMID 40267962 DOI
- Chen JT, Kan JYK, Rungcharassaeng K, et al. Inter-implant papilla changes following anterior immediate tooth replacement with socket shields: a 1- to 10-year retrospective study. Int J Periodontics Restorative Dent. 2023;43(4):451-460. PMID 37552192 DOI
- Siormpas KD, Mitsias ME, Kotsakis GA, et al. The root membrane technique: a retrospective clinical study with up to 10 years of follow-up. Implant Dent. 2018;27(5):564-574. PMID 30161062 DOI
- Teixeira Barbosa F, Carmona D, Gluckman H, Salama M. A novel approach for a volumetric variation assessment after immediate implants using socket shield technique. A report of a serie of cases. E-poster P1067, EuroPerio 8. J Clin Periodontol. 2015;42(Suppl 17):391.